10 Easy Ways To Tie A Scarf | Scarf Styling Tips
Description
Learn 10 quick and easy ways to style a scarf! Scarves are a fun way to add a pop of color to any outfit! Let us know win the comments if you have any additional questions!
Products used
100% Pure Silk Headscarf - Teal/Cobalt Paisley, Blanche Paisley, and Midnight Coral Paisley
https://www.headcovers.com/100-pure-silk-head-scarves/
Need additional resources?
How to Tie a HeadScarf
https://www.headcovers.com/resources/hats-scarves/how-to-tie-a-head-scarf/
Cancer Hats: Buying Hats & Scarves During Treatments
https://www.headcovers.com/resources/hats-scarves/cancer-hats-buying-guide/
Check Out Our Socials!
Website
https://www.headcovers.com/
Facebook
https://www.facebook.com/headcovers/
Instagram
@Headcovers.com
TRANSCRIPTION
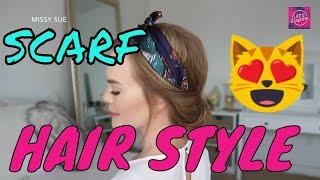
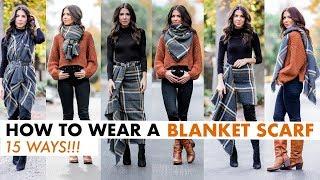
Hi I'm Tiffany with Headcovers.com and today I'm going to show you 10 ways to style a square scarf. Today I’m using our 100% pure silk scarf and this comes in a variety of prints and colors. For our first look, I’m going to be making a knotted necklace so you’ll take two opposite corners and put them together to make a triangle. Once you have your big triangle, you’ll take the long edge and put those two corners together to make a smaller triangle. Once you have the small triangle you’ll take the point of it and fold it in and roll it towards the edge. Once you have it rolled, you’ll go ahead and make a knot and you want to make sure the knot is in the center. Now we’ll tie the scarf around the neck, and this is the first look. For look number two I’m going to show you a classic neckerchief. We’re going to start again by making the first initial triangle. Now that we have the triangle we’re going to take the long ends and bring them to the back and cross them over and bring them back to the front. Now, you’ll just tie them in a knot and you can adjust it how you’d like. And this is the second look. For the next look, we’re going to create a slide knot necklace. We’re going to start with the same big triangle and you’re going to take the point and fold it in and keep rolling to the long edge. Once you have it folded, you’ll create a knot and you can leave the knot pretty big. And you’ll place the knot in the front and bring the long two ends to the back and bring them to the front again. Now that they’re at the front you’ll take each end and place it through the knot. You can tighten it or loosen it as much as needed. And this is the third look, and this is what it looks like with the scarf twisted to the side. For the next look I’ve grabbed another print of our silk scarf. Now we’re going to create a kimono and you’ll grab the corners of each side and put them together and tie a tiny knot and do the same thing on the opposite side. And now you’ll just slip your arms through the holes and this is the finished look. For our fifth look we’re going to create a shawl and for this look you’ll start with the same big triangle by putting the opposite corners and putting them together. You’ll take the two sides of the triangle and put it over your shoulders and just tie it in front. And this is the finished look, with this look you can even twist it to the side. For this next look we’re going to create a knotted headband and you’ll start with the big triangle and put the two corners together to make the smaller triangle. Then you’ll take the point and fold it towards the center and begin to roll it. Once it’s rolled, you’ll tie a knot and place it at the top of your head and tie it under your hair. For look number seven we’re going to create a headband twist and you’ll have the big initial triangle and take the point and place it towards the center and begin to roll. Once you have it rolled you’ll place the center of the scarf at the nape of the neck and bring the long two ends to the top and cross them, and cross them again. Now bring the long ends and tie them in the back and this is the twisted headband. For look number eight we’re going to make another headband and we’re going to make the same big triangle and take the pointed corner and fold it in and begin to roll. Once it’s rolled, center it on your head and take the two longs ends and tie them under your hair and this is the finished look. For look number nine we’re going to create a pony tail tie so you’ll start with the bigger triangle and make the smaller one, and you’ll follow the same steps of taking the point of the triangle and folding it in. Now you’ll take the folded scarf and tie it around your pony tail and now you have a pony tail tie. For another variation of this look you could start with the big triangle and tie a bow. For the last look we’re going to tie the scarf around a purse so all you have to do is gather the scarf in the middle and tie it around one of the straps and this is the final look. For more scarf tying videos make sure to subscribe to our channel and give this video a thumbs up. Let us know in the comments which look was your favorite. We’ll see you in the next video.














Comments