BMW E30 325i Touring Engine Bay [Restoration] - Almost Finished!
Description
Thanks to FCPEURO.com for Sponsoring This Episode, Get A Lifetime Guarantee On All Of Your Parts Here! - https://bit.ly/2zFMzAY
In this episode, I begin the process of putting the touring back together again after I stripped the front end to remove the engine (for the coupe) and to give it a quick clean.
That quick clean quickly turned into me replacing a body panel for the first time ever and now a full engine bay respray. I really did just want to give it a quick clean but when I saw how bad the rust was, it was I had a great excuse to learn something new and make some content for you guys.
After I prepare and welded a rust spot near the battery tray, I resprayed the whole engine bay and started installing the ancillaries I removed and restored in the previous episodes of the touring playlist.
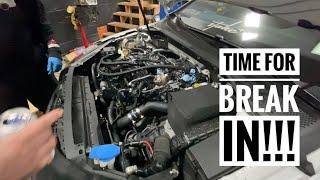
Next episode I'll add the front bumper and fenders, along with the engine if all goes to plan and we'll see if I can get this thing started and running again.
Thanks for watching! Subscribe with the bell on to see this car back to the factory condition.
Thanks to FCP Euro for supplying parts for this restoration and supporting the channel. Get a lifetime guarantee on all parts here - https://hubs.ly/H0kPPZW0
Get a Shop Manual for Your Car: http://shrsl.com/1rdef
(Available for Most Makes and Models)
#restoration #e30touring #carproject
Tools & equipment used:
Quartz Lacquer - https://goo.gl/8PTVKM
Base Coat Paint - https://goo.gl/mWhufG
Rohr 250 Welder - https://bit.ly/33mkOGP
U-Pol Weld Through Primer #2 - https://bit.ly/2qL38ak
Fast Mover 1kW Infrared Paint Dryer, Stand, Timer - https://bit.ly/2WYR9jJ
Workbenches - https://arborgardensolutions.co.uk
Moldex Full Face Mask - https://goo.gl/NNYGrv
FGL 5 Spray gun - https://goo.gl/Acg5rd
Colad Washable Overalls - https://goo.gl/3Css9E
Colad Mixing Cups - https://goo.gl/8DYmE8
Colad TurboMix Sticks - https://goo.gl/cYZfks
Colad Synthetic Paint Strainers - https://goo.gl/H79ZgL
Blasting Cabinet - https://bit.ly/2GxvKJ7
Blasting pot - https://bit.ly/32TMnrU
Cordless Ratchet - https://bit.ly/30YNlkG
Parts Washer - https://bit.ly/2K5G9wA
Rotary Tool - http://geni.us/HGed
Concentrate Degreaser - http://geni.us/yUn9
Mannesmann Socket Set - http://geni.us/HCDZ
Time Stamps:
00:00 – Intro
00:27 – The engine bay before the restoration begun
00:41 – The rust hole that needed welding
00:51 – Preparing the area for welding
01:37 – Cutting the rust out
02:41 – Weld through priming the areas to be welded
02:50 – Making the template for the new pieces to be welded in
03:20 – Cutting the new pieces out of sheet metal
03:52 – Welding two small holes
04:20 – Adding in the first big piece
05:30 – Welding in the second big piece
06:02 – Flattening the welds with a finger sander
06:20 – Adding filler over the weld
06:45 – Big change of plan
07:12 – Sanding back the filler with a block
07:29 – Keying the whole engine bay for new paint
07:36 – Removing the front left fender
07:50 – Removing a mud flap and wheel arch over
08:41 – Removing the indicator
09:06 – Actually removing the front fender
09:28 – Removing rust on the chassis
09:59 – Masking the car, ready for paint
10:14 – Priming the engine bay with wet on wet
10:48 – Painting the engine bay with the basecoat
10:58 – Quartz Crystal Clear lacquer
11:02 – Shots just after painting the engine bay
11:30 – De-masking
11:43 – All of the parts to go back onto the car
11:51 – Episode Sponsor – FCPEURO.COM
12:30 – Swapping an old bumper shock for a new one
12:50 – Restoring the old but good bumper shock
12:59 – Blasting the bumper shock
13:16 – Repairing the bumper shock
13:30 – Beginning the reassemble
13:33 – Installing Wiring loom & ABS pump
14:05 – Installing the bumper shocks
14:28 – Installing the heater core cover
14:41 - Installing the battery tray sound deadening
14:53 - Installing the engine coil
15:10 - Installing the clutch reservoir
15:19 - Installing the washer fluid tank
15:37 - Hooking up the ABS pump
15:45 - Installing the coolant expansion tank
15:53 - Installing the main fuse box connector mount
16:05 - Installing the window wiper grills
16:15 - Installing the headlight clips and headlights
16:41 - A visit from the boss
17:07 - Installing the front grills
17:26 - Roughly installing the bonnet notches
17:47 - Installing the brake fluid reservoir
17:57 - Installing washer fluid tank pumps
18:07 - Installing various clips
18:13 - Installing the top rubber strip
18:33 - Installing the two UCP – Unidentified Car Parts
18:48 - outro/where we are so far
19:06 - Thanks
My Patreon Page:
https://www.patreon.com/RestoreIt
My Twitter Page:
https://twitter.com/Restore__It
My Facebook Page:
https://www.facebook.com/RestoreItCha...
My Instagram Page:
@RestoreItChannel
PayPal Donations:
[email protected]
Discord:
I now also have a discord server if you want to chill with like-minded people:
https://discord.gg/vNmCBk9


Comments