Honda CRF450 Top End Teardown | 2005 Honda CRF450-R Engine Rebuild Part 2 | Partzilla.com
Description
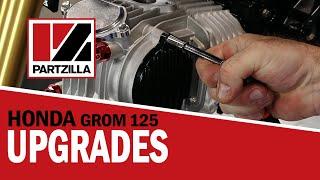
Check out the Wiseco Garage Buddy kit for the Honda CRF450R here: http://partzil.la/Honda-CRF450-Garage-Buddy-Kit
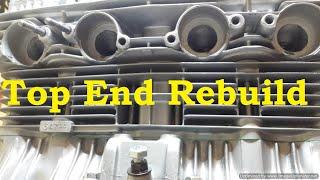
In part two of our Honda CRF450 engine rebuild, we’re working on getting the cylinder head and piston removed. This takes a little patience, as there are a couple of points where you need to work through loosening bolts incrementally to relieve the torque on bolts and parts evenly.
We’ll start by removing the valve cover and finding top dead center on our CRF450. Then, we’ll work on our cam chain tensioner and gear. Then, we’ll work a little at a time on each of the bolts holding the head in place to get it unbolted from the engine. Underneath, we’ll get the piston out.
Once we’re done, John will tell us what he’s seeing as he examines the valves, cylinder walls, and the piston, and he’ll show us why he thinks the Wiseco kit we’re going with is a good choice for this motor.
See the Honda CRF450 cylinder head diagram here: https://www.partzilla.com/catalog/honda/motorcycle/2005/crf450r-a/cylinder-head?utm_source=youtube&utm_medium=video&utm_campaign=description_btf
See the camshaft and valve assembly: https://www.partzilla.com/catalog/honda/motorcycle/2005/crf450r-a/camshaft-valve?utm_source=youtube&utm_medium=video&utm_campaign=description_btf
The CRF450 piston diagram is here: https://www.partzilla.com/catalog/honda/motorcycle/2005/crf450r-a/crankshaft-piston?utm_source=youtube&utm_medium=video&utm_campaign=description_btf
Watch us remove the engine on our Honda CFR450 here: https://youtu.be/mqdF59QMW7Q
VIDEO HIGHLIGHTS:
Removing the valve cover - 1:15
Finding top dead center - 2:03
Removing the cam chain tensioner - 3:20
Removing the cam gear - 4:00
Removing the cam assembly holder - 4:45
Unbolting the head - 5:30
Removing the head - 6:30
Unbolting the cylinder - 7:20
Removing the piston - 8:15
Find more 2005 Honda CRF450 diagrams here: https://www.partzilla.com/catalog/honda/motorcycle/2005/crf450r-a?utm_source=youtube&utm_medium=video&utm_campaign=description_btf
Talk to us:
Twitter: https://twitter.com/partzilla
Facebook: https://www.facebook.com/Partzilla
Instagram: https://www.instagram.com/partzilla/
In the video we’re working with a 2005 Honda CRF450R, but you may have similar steps for your Honda dirt bike. If you’re not sure whether these steps apply to your machine, leave a comment and we’ll get back to you.
RELATED CONTENT:
CRF450R rear brake pads:
https://youtu.be/DZWG_ubPPnk


Comments